
Setting up your own recording studio in your backyard could be an exciting project to consider if you’re a producer or a musician. It can provide you with your own space away from your home to play and record your own tracks. You could even charge other musicians to record songs here. Just how do you set up your own recording studio? Below is a simple step-by-step guide.
Consider the size and location
It’s up to you as to how big you want your recording studio to be. Ideally, you want enough space to comfortably sing or perform any instruments (if you’re putting a drum kit or piano in there, it will need to be on the larger side). The size will also be limited by your budget and the location. In fact, it’s very important to consider where you place your recording studio in your backyard. Some things to consider when choosing the location include:
- Stability of the ground
- Distance from noise sources
- Accessibility from your home
- Easily connectable to the electric grid
Build the foundation
Your recording studio needs a solid base to prevent it from sinking. Take your time to explore different styles of shed bases. For lightweight studios that you plan to build on a tight budget, consider a plastic foundation. For studios made of heavy materials or containing heavy equipment, a concrete foundation may be necessary.
Construct the walls and roof
Next, you need to build the walls and the roof. You need to choose solid waterproof materials that will protect your equipment from the threat of water damage. At the same time, it could be worth adding some ventilation to prevent mold growth. A pitched roof is recommended for encouraging water runoff and creating more natural acoustics.
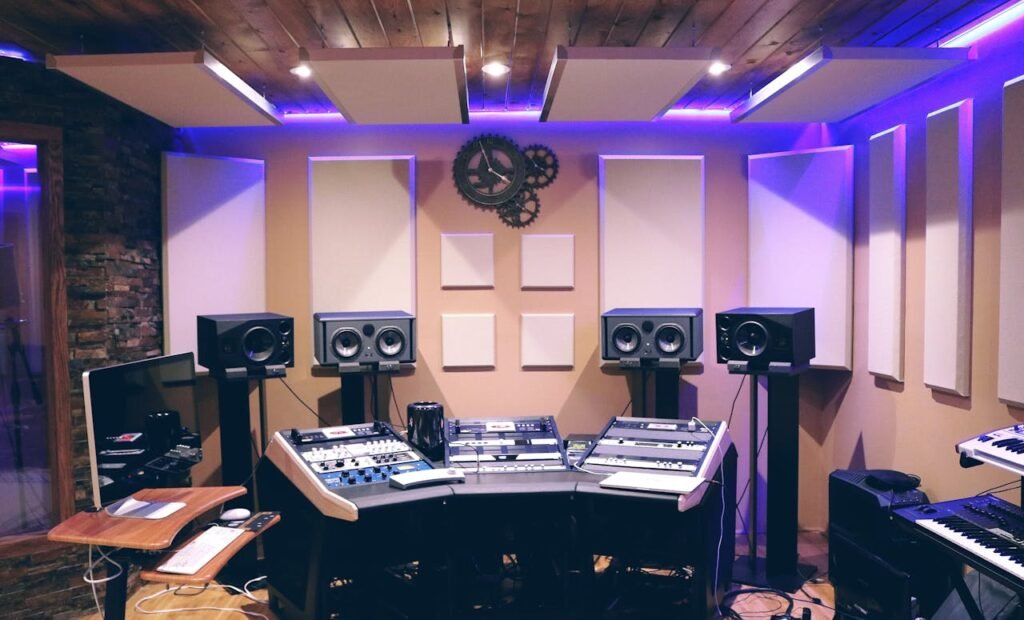
Soundproof your studio
Soundproofing your studio is important for preventing outside noise getting in. You can also help to prevent unwanted echo and reverb with the right acoustic treatments. A few different soundproofing solutions to consider include:
- Acoustic panels: These are designed to absorb sound and are worth installing on the interior walls and roof of your recording studio.
- Corner bass traps: These are made from fiberglass or mineral wool and are designed to absorb low-frequency sound waves.
- Exterior insulation: Weatherproof sound insulating cladding can be placed on the exterior of your studio to further prevent sound getting in.
- Carpet and curtains: Fabric surfaces are excellent at absorbing sound to prevent unwanted echo.
- Double glazed windows: When adding windows to your studio, choose double glazing to limit noise.
Set up your equipment
Now that your studio is all built, it’s time to add your equipment. Hiring an electrician to wire up some electrical sockets will be necessary to power all electrical equipment such as lighting, computers, keyboards, amps, audio interfaces, microphones and speakers. Make sure you have enough sockets for all your equipment and consider investing in top quality recording gear. Add a comfortable chair and desk and feel free to decorate your studio with posters, pictures and vinyl for inspiration. You may even want to install racks for hanging guitars or shelves for vinyl/CDs (your studio could also serve as a place for listening to music).